LesCaS: Web Application
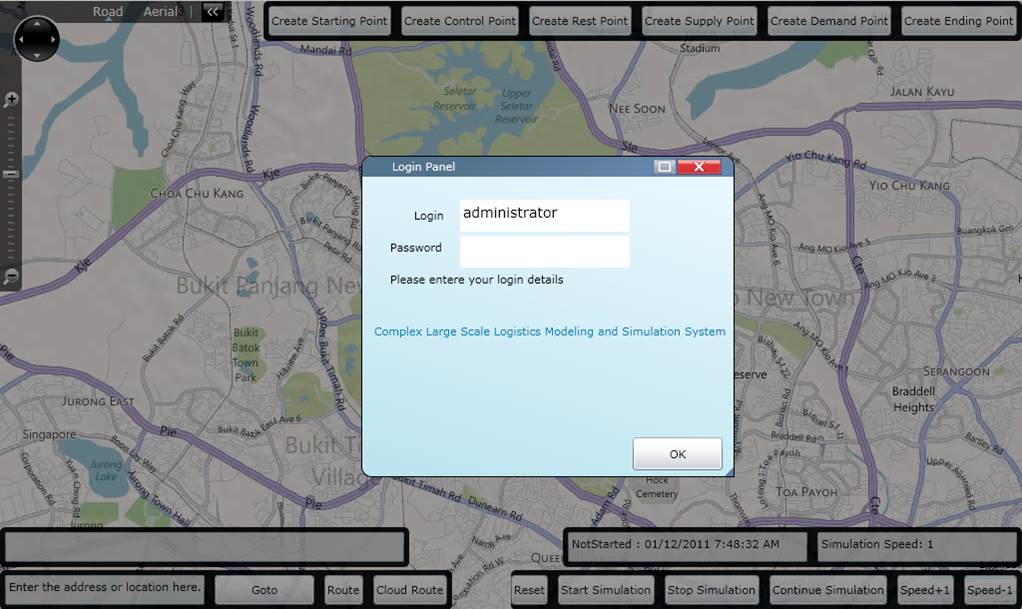
Online Web Application Login
Open a web browser (preferable Internet Explorer or Google Chrome) and access to

Enter the administrator password in the login dialog.
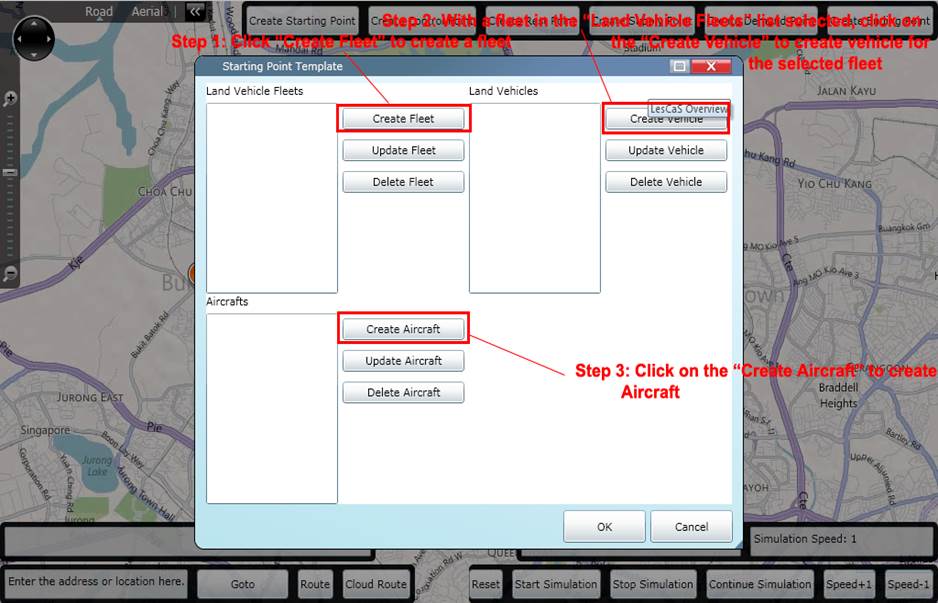
Create Starting Point
Click a location on the map, then click the Create Starting Point button on the upper right of the map, the following Starting Point Template dialog will be presented. Follow the three steps in the figure below to add land vehicles and aircrafts which will be starting from this starting point. Click the OK button to create the starting point or Cancel button to cancel the action. Note that for each of the fleet, it must be assigned to one of the ending point.
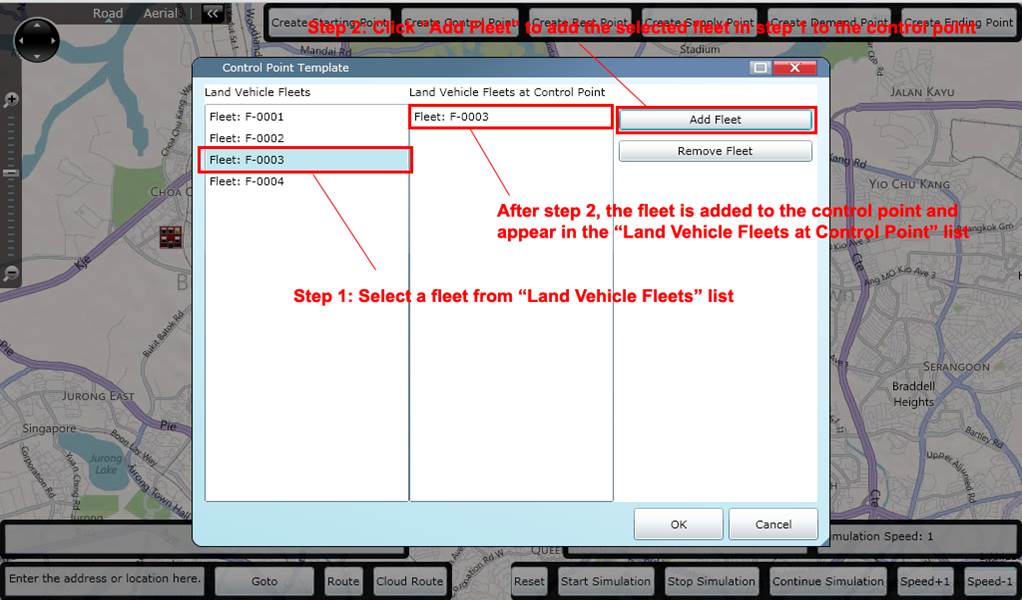
Create Control/Rest/Ending Point
The steps for creating control/rest/ending points are similar, user can refer to the creation of control point as an example for other two points.
Click a location on the map, then click the Create Control Point button on the upper right of the map, Control Point Template dialog will be presented. Follow the steps in the Figure below to add the fleets to the control point to be created. Lastly, click OK to create the point.
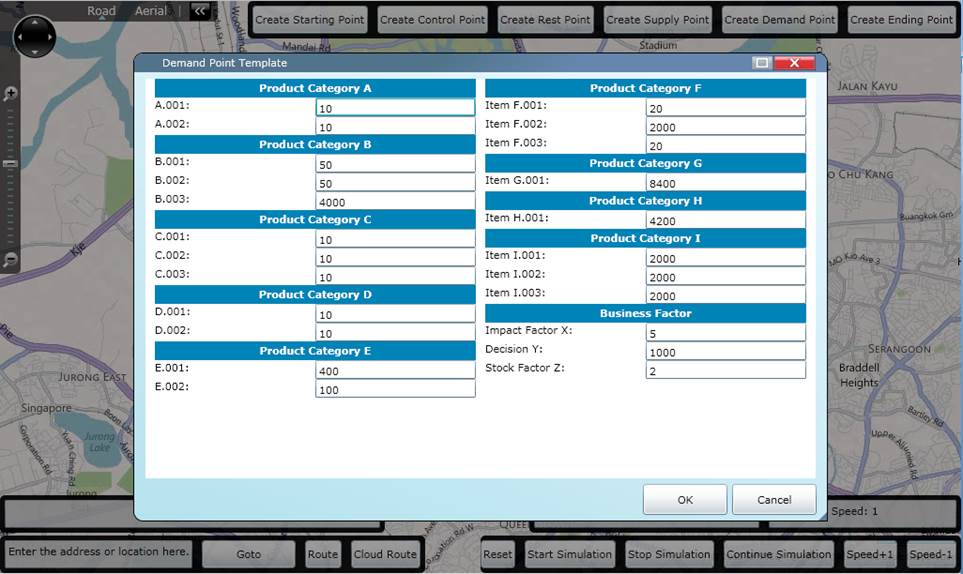
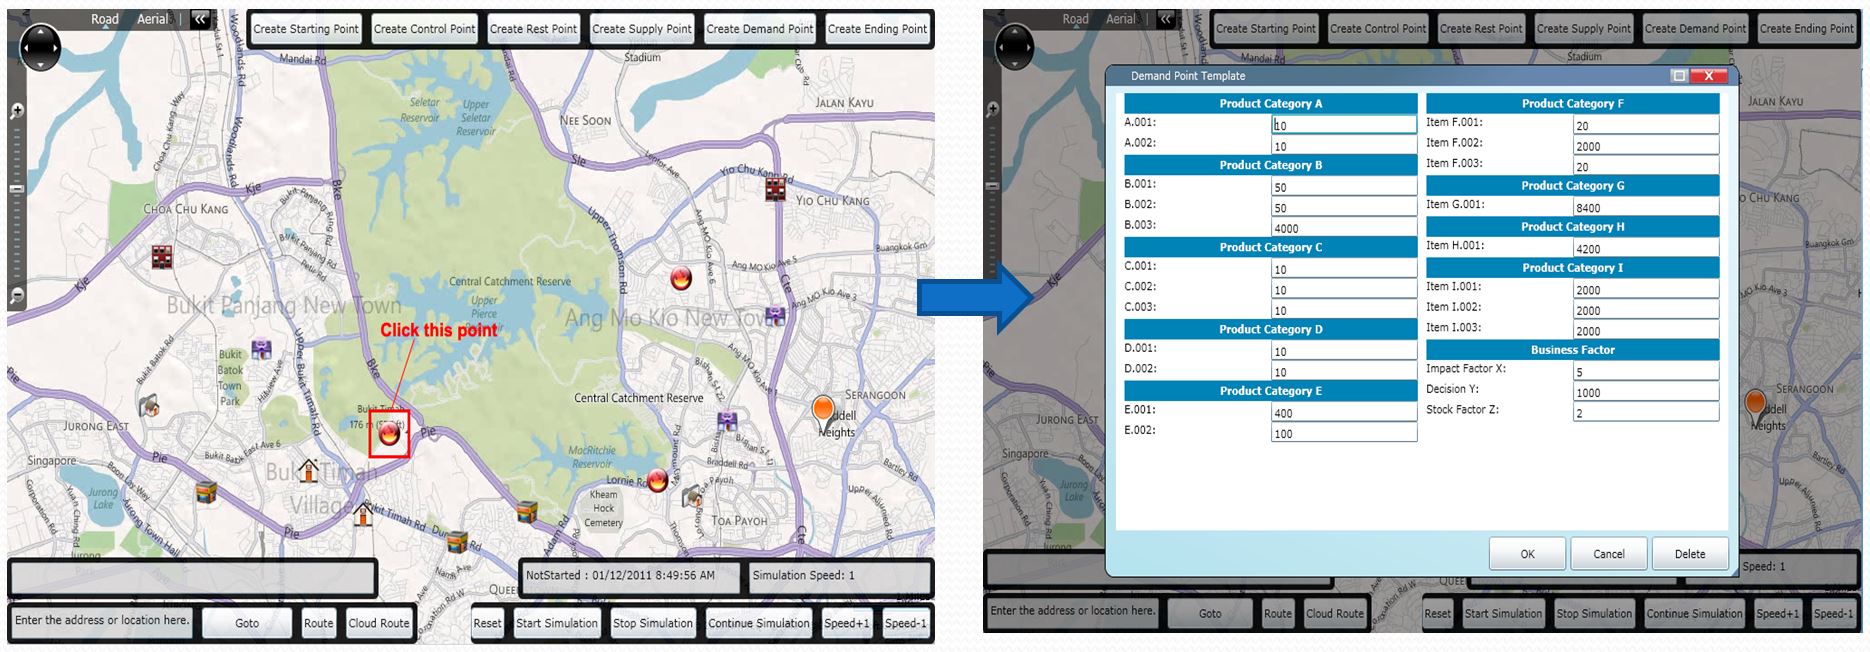
Create Supply/Demand Point
The steps for creating supply and demand points are similar, user can refer to the creation of demand point as an example to create supply point as well.
Click a location on the map, then click on the Create Demand Point button on the upper right of the map, Demand Point Template dialog will be presented. After changing the parameter values, click OK button to create the demand point.
Update User-Defined Point
After user has created a user-defined point such as supply point, user can go back and update/delete the point by selecting it on the map.
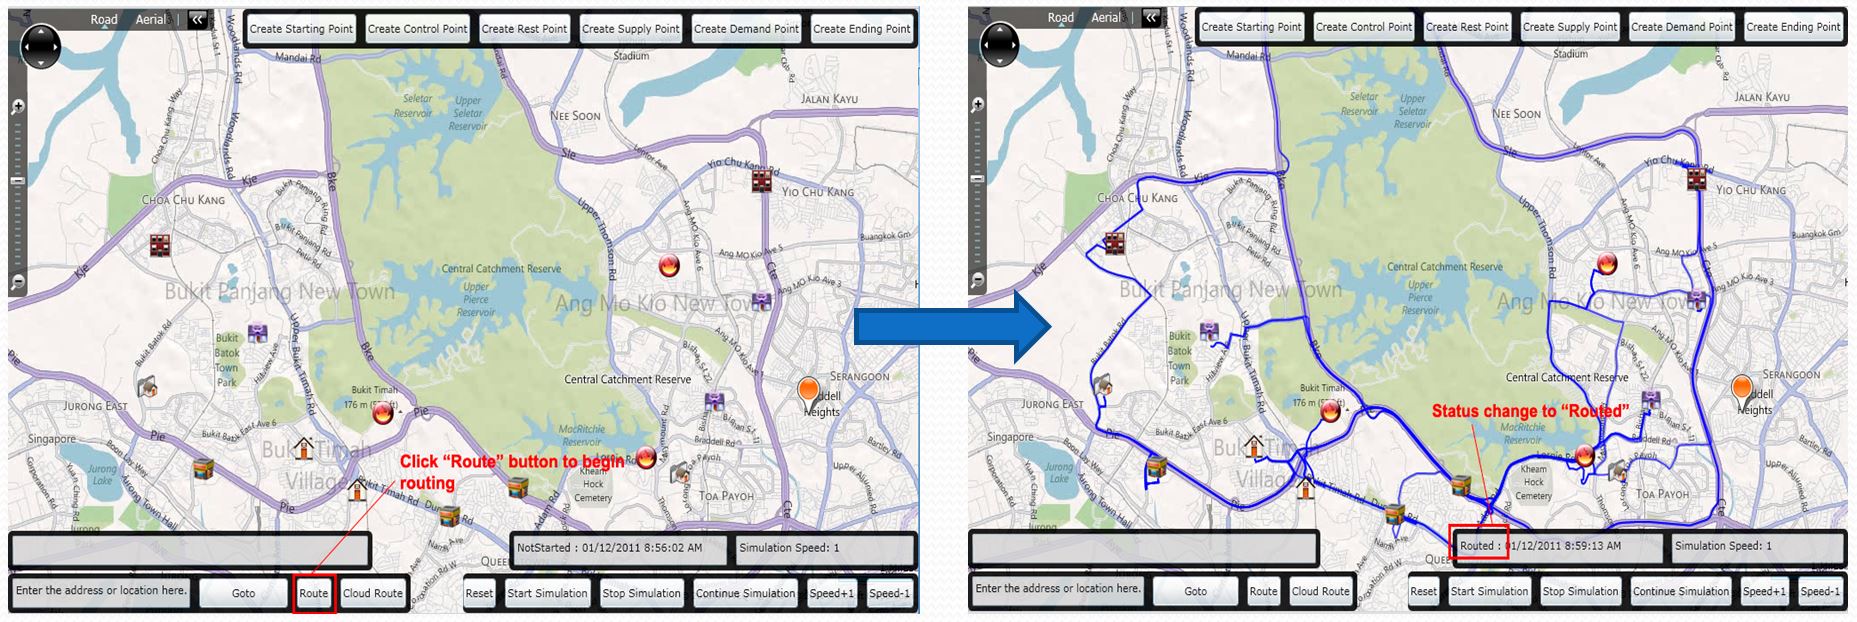
Routing
After user defines all the points, user can click on the Route button to generate the routes for the supply chain routing, as shown in Figure below. Note that clicking once on the Route button may not be sufficient, user may need to press the button several times until the status bar at the lower right of the map change from NotStarted to Routed.
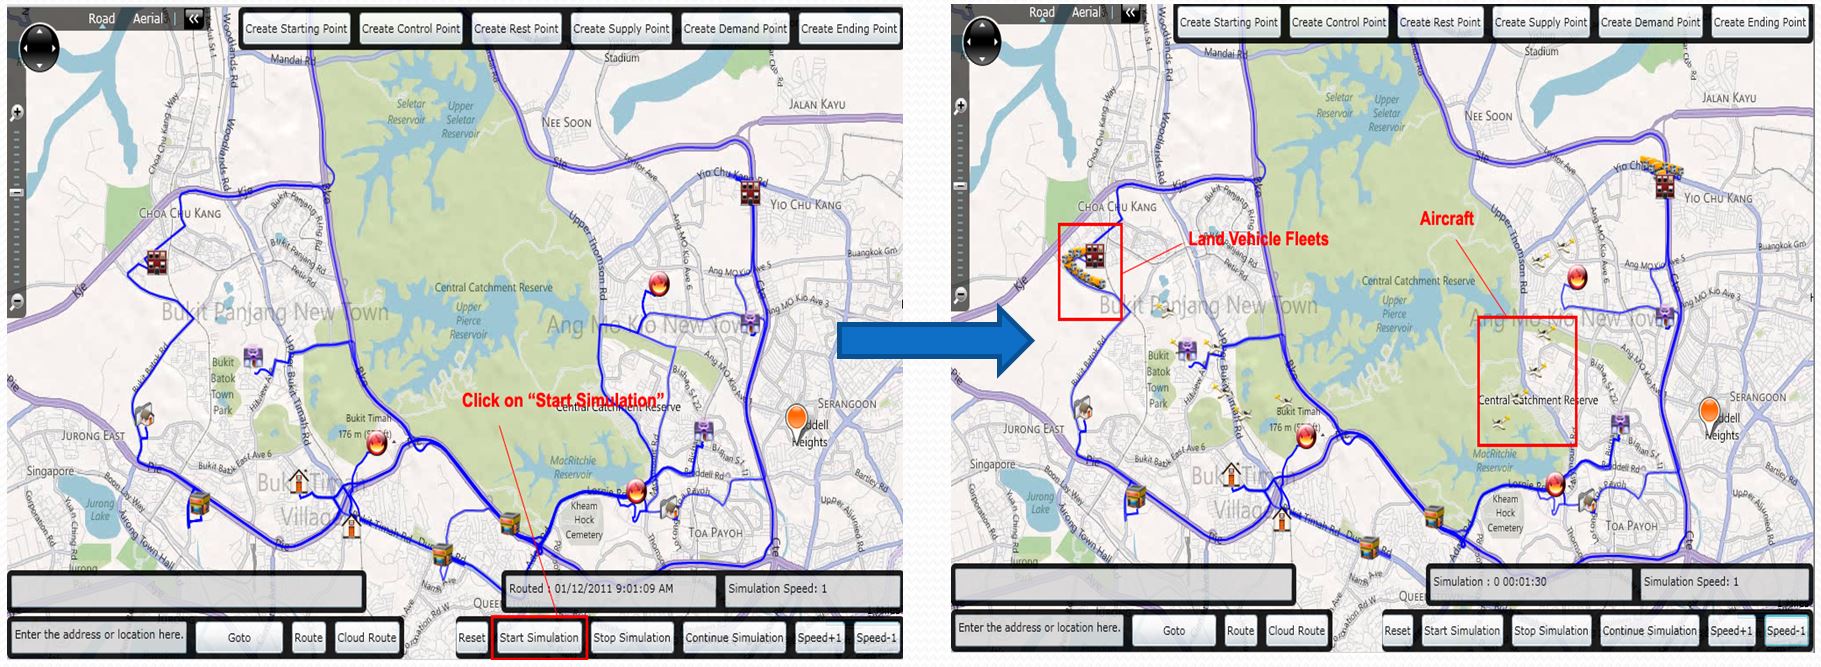
Simulation
Click the Start Simulation button to start the simulation after routing, as shown in Figure below. User can then stop/continue the simulation or increase/decrease the simulation speed by clicking the buttons next to the Start Simulation button.
Reset
Click the Reset button at the lower right of the map to clear all the user-defined points and routes on the map to restart. User can go to any location in the world to setup the supply chain simulation, by entering the name of the location in the text box at the lower left of the map and click on the Goto button.